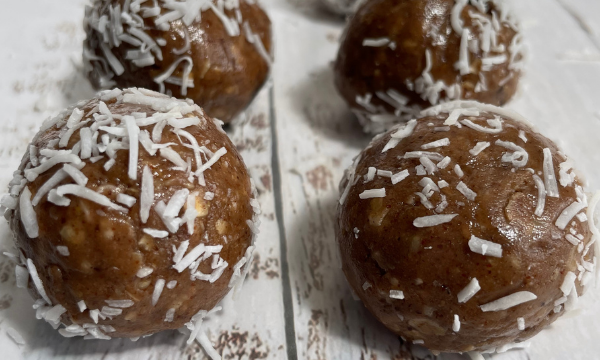
Another day, another protein ball recipe! This time featuring Chocolate Coconut Protein Balls. I’ll admit, I never used to like coconut. However, over the past few years I have come to not only like it but quite honestly love it! I love how fresh and flavourful it is. I also love how coconut can transport me to a tropical island. It has become somewhat of a comfort flavour for me!
But enough about me and coconut. Let’s talk about these Chocolate Coconut Protein Balls. As most of my protein ball recipes, they are easy to make gluten free by simply using gluten free oats. Further to that, they are just as easy to make vegan by swapping the honey for maple syrup. Not only that but they are packed with flavour and protein!
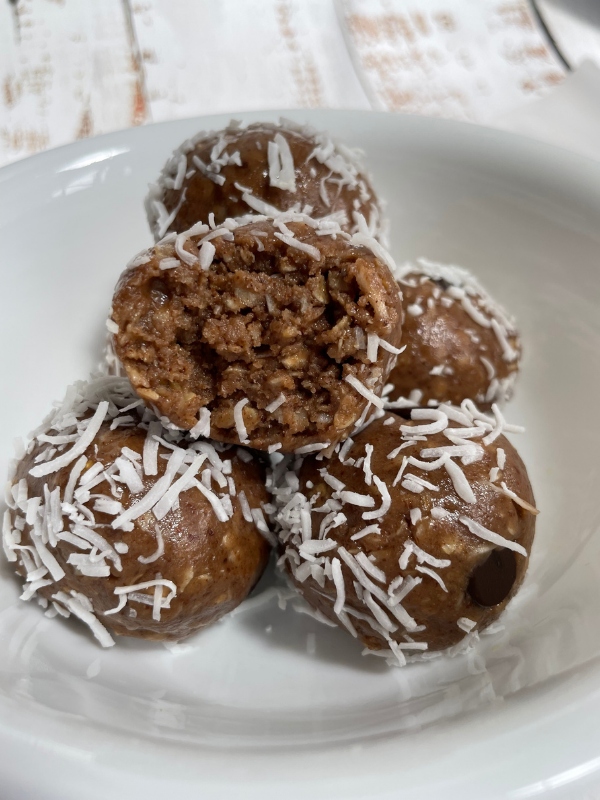
I recently posted my Chocolate Protein Almond butter which includes a big ole scoop of protein powder. That combined with the chocolate chips give it the perfect chocolate flavour. While the coconut inside and on top of the ball make it irresistible.
These Chocolate Coconut Protein balls are a great snack after a workout or in the middle of the day. My husband loves to have these for breakfast with his morning coffee. He finds they stick with him all morning.
Lastly, like all of my protein ball recipes, they are no-bake making them extra easy to whip up when you’re in a pinch.

Ingredients
1 cup oats
1 cup Chocolate Protein Almond Butter
½ cup honey
3 TBSP unsweetened shredded coconut
1 tsp vanilla
2 TBSP chocolate chips
Extra unsweetened shredded coconut for dusting
Instructions
- Add oats, CP almond butter and honey in a medium bowl until just combined
- Add coconut, vanilla and chocolate chips and mix until well combined
- Firm in refrigerator for 15 minutes
- Roll individual balls by the tablespoon to yield approximately 15 protein balls
- Place desired amount of shredded coconut in a bowl or on wax paper and roll each ball in the coconut until the entire surface is covered.
- Store in a seal tight container in the refrigerator.
If you tried and enjoyed this recipe please save and Pin on Pinterest and follow me, Running On Forks.
Cheers to a healthier you!
Tricia
xo